|
|
||
|---|---|---|
| common | ||
| dao | ||
| images | ||
| module | ||
| server-gateway | ||
| service | ||
| service-client | ||
| .gitignore | ||
| ReadMe.md | ||
| pom.xml | ||
ReadMe.md
Spring微服务模板
每个服务下都有Dockerfile文件,几乎是写好的模板,如果要添加在这基础上即可。
-
基础包有
- 微服务基础功能,openFein
- 邮件发送
- WebSocket
- Minio
- Redis
- rabbitMq
- velocity
- IP地址查询
- knife4j
- 数据库多源配置
-
启动类一共有两个,网关是必不可少的
- web端
- admin端
- gateway网关
基础配置
微服务模块
微服务请求其它模块无法从线程中获取到值,将用户Token放在请求头中这样从请求头中获取Token即可
common/common-service/src/main/java/cn/bunny/common/service/interceptor/UserTokenFeignInterceptor.java
/**
 * * 微服务请求其它模块找不到Token,无法从线程中获取值
 * 传递请求头,在微服务中
 */
public class UserTokenFeignInterceptor implements RequestInterceptor {
    @Override
    public void apply(RequestTemplate requestTemplate) {
        ServletRequestAttributes requestAttributes = (ServletRequestAttributes) RequestContextHolder.getRequestAttributes();
        assert requestAttributes != null;
        HttpServletRequest request = requestAttributes.getRequest();
        String token = request.getHeader("token");
        requestTemplate.header("token", token);
    }
}
配置文件详情
打包命令
命令解释:清理之前内容,打包,使用生产环境,跳过测试
mvn clean package -Pprod -DskipTests
SpringBoot配置文件
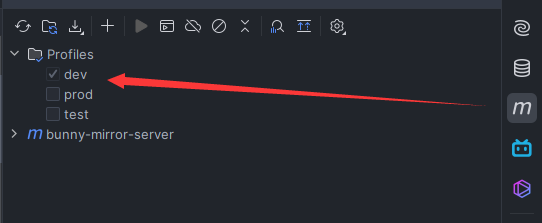
在开发中需要使用到开发环境、上线需要生产环境,在环境中设置@profiles.active@可以根据不同环境切换
spring:
  profiles:
    active: @profiles.active@
  application:
    name: service-admin
只需要在IDE中勾选相关环境即可
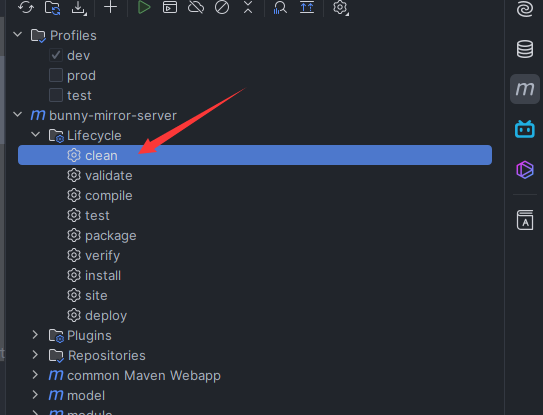
注意!!!
因为Java每次启动都需要生成target,有缓存在里面,很有可能明明选择了配置但是没有生效的情况。
解决办法就是,每次改变环境执行
mvn clean或者点击IDE中mvn clean
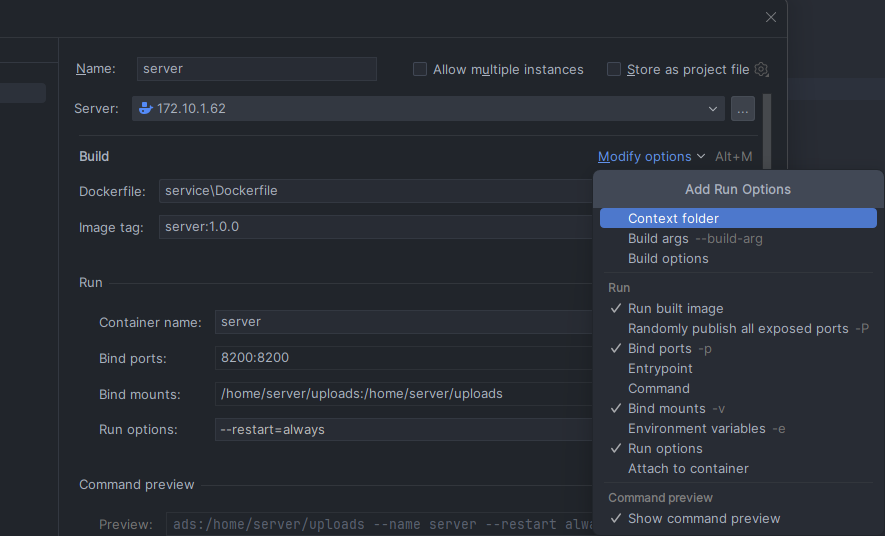
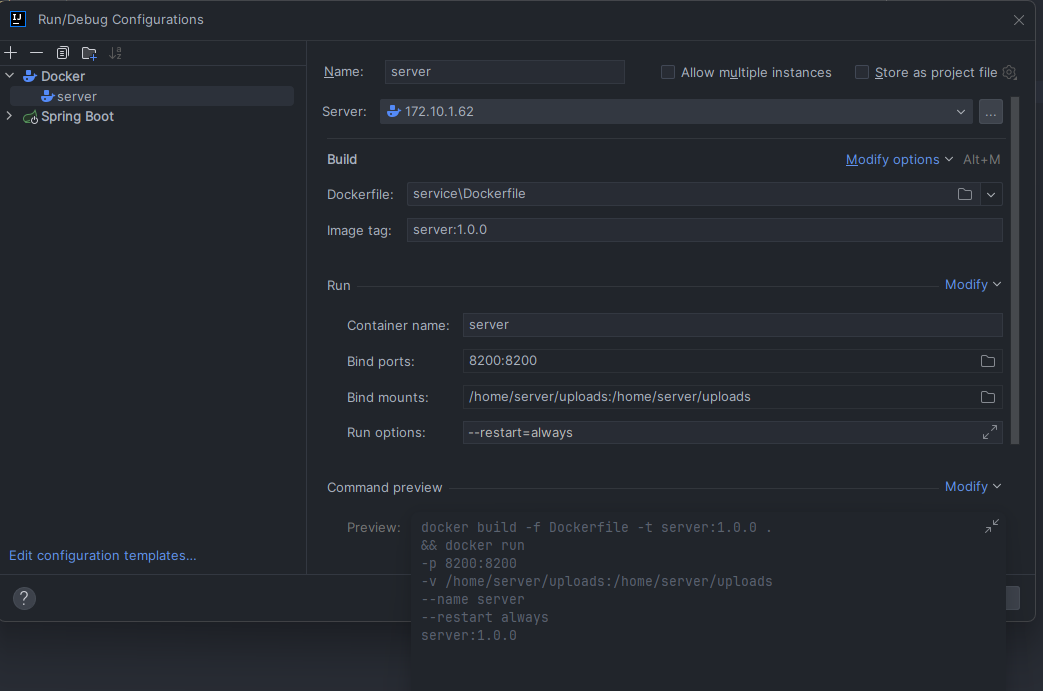
Dockerfile配置
如果需要访问宿主机文件目录,这个是Docker内部地址
# 程序内部挂在目录
VOLUME /home/server/uploads
IDE中配置
整体返回响应
整体返回响应如下
// 状态码
private Integer code;
// 返回消息
private String message;
// 返回数据
private T data;
和分页返回
/**
 * 封装分页查询结果
 */
@Data
@AllArgsConstructor
@NoArgsConstructor
@Builder
public class ResultPage<T> implements Serializable {
    // 当前页
    private Integer pageNo;
    // 每页记录数
    private Integer pageSize;
    // 总记录数
    private long total;
    // 当前页数据集合
    private List<T> list;
}
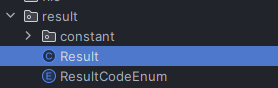
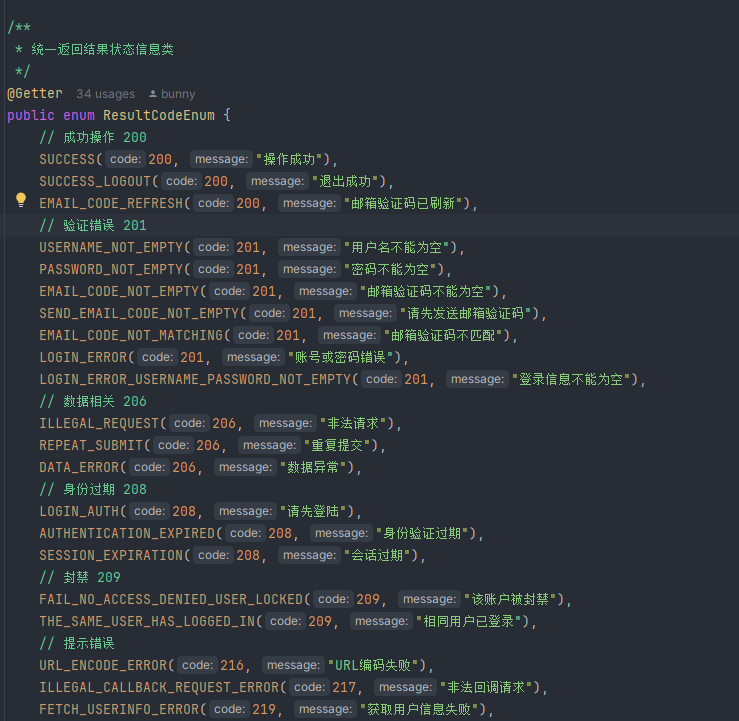
以及常用的枚举状态码(展示部分)
多数据库源配置
开发中有时会使用到多个数据库源,这个配置也是来自MybatisPlus官方推荐的库
<!-- 多数据库源插件 -->
<dependency>
    <groupId>com.baomidou</groupId>
    <artifactId>dynamic-datasource-spring-boot3-starter</artifactId>
    <version>4.3.1</version>
</dependency>
配置简介
如果不需要多数据库,移除包之后将注释的部分放开,删除dynamic节点以下内容
datasource:
  #    type: com.zaxxer.hikari.HikariDataSource
  #    driver-class-name: com.mysql.cj.jdbc.Driver
  #    url: jdbc:mysql://${bunny.datasource.host}:${bunny.datasource.port}/${bunny.datasource.sqlData}?serverTimezone=GMT%2B8&useSSL=false&characterEncoding=utf-8&allowPublicKeyRetrieval=true
  #    username: ${bunny.datasource.username}
  #    password: ${bunny.datasource.password}
  dynamic:
    primary: master #设置默认的数据源或者数据源组,默认值即为master
    strict: false #严格匹配数据源,默认false. true未匹配到指定数据源时抛异常,false使用默认数据源
    grace-destroy: false #是否优雅关闭数据源,默认为false,设置为true时,关闭数据源时如果数据源中还存在活跃连接,至多等待10s后强制关闭
    datasource:
      master:
        type: com.zaxxer.hikari.HikariDataSource
        driver-class-name: com.mysql.cj.jdbc.Driver
        url: jdbc:mysql://${bunny.datasource.host}:${bunny.datasource.port}/${bunny.datasource.sqlData}?serverTimezone=GMT%2B8&useSSL=false&characterEncoding=utf-8&allowPublicKeyRetrieval=true
        username: ${bunny.datasource.username}
        password: ${bunny.datasource.password}
    aop:
      enabled: true
中间件配置
mybatis-plus
配置详情
配置乐观锁、防止全表删除、最大分页100页
common/service-utils/src/main/java/cn/bunny/common/service/config/MybatisPlusConfig.java
/**
 * Mybatis-Plus配置类
 */
@EnableTransactionManagement
@Configuration
@Slf4j
public class MybatisPlusConfig {
    @Bean
    public MybatisPlusInterceptor mybatisPlusInterceptor() {
        MybatisPlusInterceptor interceptor = new MybatisPlusInterceptor();
        // 分页插件
        PaginationInnerInterceptor paginationInnerInterceptor = new PaginationInnerInterceptor(DbType.MYSQL);
        paginationInnerInterceptor.setMaxLimit(100L);// 设置最大分页为100
        interceptor.addInnerInterceptor(paginationInnerInterceptor);
        // 乐观锁
        interceptor.addInnerInterceptor(new OptimisticLockerInnerInterceptor());
        // 防止全表删除
        interceptor.addInnerInterceptor(new BlockAttackInnerInterceptor());

        return interceptor;
    }
}
如果如要插入和修改时,自定义时间或者其它可以在这设置
common/service-utils/src/main/java/cn/bunny/common/service/config/MyBatisPlusFieldConfig.java
/**
 * 配置MP在修改和新增时的操作
 */
@Component
public class MyBatisPlusFieldConfig implements MetaObjectHandler {

    /**
     * 使用mp做添加操作时候,这个方法执行
     */
    @Override
    public void insertFill(MetaObject metaObject) {
        // 设置属性值
        this.setFieldValByName("createTime", new Date(), metaObject);
        this.setFieldValByName("updateTime", new Date(), metaObject);
        this.setFieldValByName("deleteStatus", 1, metaObject);
        if (BaseContext.getUsername() != null) {
            this.setFieldValByName("createBy", BaseContext.getUsername(), metaObject);
            this.setFieldValByName("updateBy", BaseContext.getUsername(), metaObject);
        }
    }

    /**
     * 使用mp做修改操作时候,这个方法执行
     */
    @Override
    public void updateFill(MetaObject metaObject) {
        this.setFieldValByName("updateTime", new Date(), metaObject);
        this.setFieldValByName("updateBy", BaseContext.getUsername(), metaObject);
    }
}
Redis
配置详情
分别设置了过期30天、1小时、3分钟
common/service-utils/src/main/java/cn/bunny/common/service/config/RedisConfiguration.java
/**
 * * 配置Redis过期时间30天
 * 解决cache(@Cacheable)把数据缓存到redis中的value是乱码问题
 */
@Bean
@Primary
@SuppressWarnings("all")
public CacheManager cacheManagerWithMouth(RedisConnectionFactory factory) {
    // 配置序列化
    RedisCacheConfiguration config = RedisCacheConfiguration.defaultCacheConfig()
            .serializeKeysWith(RedisSerializationContext.SerializationPair.fromSerializer(new StringRedisSerializer()))
            .serializeValuesWith(RedisSerializationContext.SerializationPair.fromSerializer(jsonRedisSerializer()))
            .entryTtl(Duration.ofDays(30));

    return RedisCacheManager.builder(factory).cacheDefaults(config).build();
}

/**
 * * 配置redis过期时间3分钟
 *
 * @param factory
 * @return
 */
@Bean
@SuppressWarnings("all")
public CacheManager cacheManagerWithMinutes(RedisConnectionFactory factory) {
    // 配置序列化
    RedisCacheConfiguration config = RedisCacheConfiguration.defaultCacheConfig()
            .serializeKeysWith(RedisSerializationContext.SerializationPair.fromSerializer(new StringRedisSerializer()))
            .serializeValuesWith(RedisSerializationContext.SerializationPair.fromSerializer(jsonRedisSerializer()))
            .entryTtl(Duration.ofMinutes(3));

    return RedisCacheManager.builder(factory).cacheDefaults(config).build();
}

/**
 * * 配置Redis过期时间1小时
 *
 * @param factory
 * @return
 */
@Bean
@SuppressWarnings("all")
public CacheManager cacheManagerWithHours(RedisConnectionFactory factory) {
    // 配置序列化
    RedisCacheConfiguration config = RedisCacheConfiguration.defaultCacheConfig()
            .serializeKeysWith(RedisSerializationContext.SerializationPair.fromSerializer(new StringRedisSerializer()))
            .serializeValuesWith(RedisSerializationContext.SerializationPair.fromSerializer(jsonRedisSerializer()))
            .entryTtl(Duration.ofHours(1));

    return RedisCacheManager.builder(factory).cacheDefaults(config).build();
}
使用详情
如果需要指定Redis配置,cacheManager="Redis配置中方法名"
使用springCache只需要在方法上加上下面代码
@Cacheable(value = "TaskStatistics", key = "'ByDepartment::'+#departmentName",
        cacheManager = "cacheManagerWithMinutes")
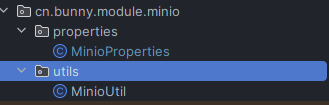
Minio
配置详情
Minio没有给出SpringBoot的配置文件,下面是自定义实现
module/module-minio/src/main/java/cn/bunny/module/minio/properties/MinioProperties.java
在配置文件中有这4个配置字段
@Configuration
@ConfigurationProperties(prefix = "bunny.minio")
@ConditionalOnProperty(name = "bunny.minio.bucket-name")// 当属性有值时这个配置才生效
@Data
@Slf4j
public class MinioProperties {
    private String endpointUrl;
    private String accessKey;
    private String secretKey;
    private String bucketName;

    @Bean
    public MinioClient minioClient() {
        log.info("注册MinioClient...");
        return MinioClient.builder().endpoint(endpointUrl).credentials(accessKey, secretKey).build();
    }
}
在项目中加入了Minio常用工具方法,对Minio二次封装
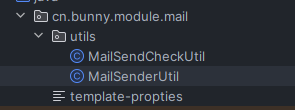
邮箱发送
邮箱发送配置的是动态邮件,发件人是动态的不是写死在配置文件中
配置文件
如果不需要动态配置可以在SpringBoot配置文件中加入下面的配置
mail:
    host: smtp.qq.com # 邮箱地址
    port: 465 # 邮箱端口号
    username: xxx@qq.com # 设置发送邮箱
    password: xx # 如果是纯数字要加引号
    default-encoding: UTF-8 # 设置编码格式
    protocol: smtps
    properties:
      mail:
        debug: true # 是否开启debug模式发送邮件
        smtp:
          auth: true
          connectionTimeout: 5000 # 设置连接延迟
          timeout: 5000 # 延迟时间
          writeTimeout: 5000 # 写入邮箱延迟
          allow8BitMime: true
          sendPartial: true
          ssl:
            enabled: true # 是否开启SSL连接
          socketFactory:
            class: javax.net.ssl.SSLSocketFactory # 必要设置!!!
SpringSecurity
因为项目做的是开发模板,在admin模板中集成了安全框架
module/spring-security/src/main/java/cn/bunny/security/config/WebSecurityConfig.java
在这个文件最下面是排除路径,不需要Security检测的路径,根据自己需求进行修改,因为整合了knife4j在测试时,需要放开swagger配置响应请求等。
/**
 * * 排出鉴定路径
 *
 * @return WebSecurityCustomizer
 */
@Bean
public WebSecurityCustomizer webSecurityCustomizer() {
    String[] annotations = {"/", "/test/**", "/diagram-viewer/**", "/editor-app/**", "/*.html",
            "/*/*/noAuth/**", "/*/noAuth/**", "/favicon.ico", "/swagger-resources/**", "/webjars/**",
            "/v3/**", "/swagger-ui.html/**", "/doc.html"};
    return web -> web.ignoring().requestMatchers(annotations);
}