59 KiB
Spring笔记
- 公共AI网站:https://chatgptplus.cn/
- vue3官网:https://cn.vuejs.org/
- SpringBoot官网:https://docs.spring.io/spring-boot/index.html
Ant风格访问
Spring MVC 支持 Ant 风格(Ant-style path matching)主要体现在 URL 路径匹配模式上。这种模式是 Spring Web 框架用来进行 URL 模式匹配的一种方式,借用了 Apache Ant(一个流行的 Java 构建工具)中的路径匹配规则。Ant 风格的路径匹配使得 URL 路径映射更加灵活和方便。
*匹配单一路径层级中的任意字符。**匹配任意多个路径层级。?匹配单个字符。
1. Ant 风格路径匹配规则
Ant 风格的路径匹配规则中有几个特殊字符,分别是 *、** 和 ?,它们具有不同的匹配意义:
(1) *(匹配零个或多个字符)
*可以匹配路径中的任何部分,但只能匹配单一层级中的路径。- 举个例子,
/foo/*可以匹配/foo/bar或/foo/abc,但不能匹配/foo/bar/baz。 - 示例:
/foo/*匹配/foo/bar。/foo/*/bar匹配/foo/abc/bar。
(2) **(匹配零个或多个目录)
**可以匹配多个目录层级,它比*更加强大,能够跨越多个层级。- 示例:
/foo/**/bar匹配/foo/bar、/foo/abc/bar、/foo/abc/def/bar等。/foo/**/bar/**/baz匹配/foo/abc/bar/xyz/baz。
(3) ?(匹配单个字符)
?用于匹配单个字符,不是零个或多个字符。它通常用于精确匹配某些路径中的单个字符。- 示例:
/foo/a?c可以匹配/foo/abc,但不能匹配/foo/abcc。
2. Ant 风格的路径匹配应用
Spring MVC 采用了这种路径匹配方式,使得映射 URL 路径时更加灵活。例如,使用 @RequestMapping 注解来定义控制器方法时,可以利用 Ant 风格的路径匹配规则。
示例 1:@RequestMapping 使用 Ant 风格
@Controller
public class MyController {

    @RequestMapping("/foo/*")  // 匹配路径 /foo/bar 或 /foo/abc
    public String handleFoo() {
        return "foo";
    }

    @RequestMapping("/foo/**") // 匹配路径 /foo/bar 或 /foo/abc/xyz
    public String handleFooRecursive() {
        return "fooRecursive";
    }

    @RequestMapping("/foo/a?c") // 匹配路径 /foo/abc,但不匹配 /foo/abcc
    public String handleSpecificPattern() {
        return "specificPattern";
    }
}
在这个例子中:
/foo/*只会匹配/foo/bar或/foo/abc等简单路径。/foo/**会匹配/foo/bar、/foo/abc/xyz等多层次路径。/foo/a?c会匹配/foo/abc,但不会匹配/foo/abcc。
示例 2:@RequestMapping 配合请求方法
Spring MVC 还支持在映射中结合请求方法(如 GET、POST)来实现更细粒度的路径匹配:
@Controller
@RequestMapping("/foo")
public class FooController {

    @RequestMapping(value = "/bar/*", method = RequestMethod.GET)  // GET 请求
    public String handleBar() {
        return "barGET";
    }

    @RequestMapping(value = "/bar/**", method = RequestMethod.POST) // POST 请求
    public String handleBarPost() {
        return "barPOST";
    }
}
在这个例子中:
/foo/bar/*仅在处理GET请求时匹配。/foo/bar/**仅在处理POST请求时匹配。
3. Ant 风格路径与通配符的结合使用
在实际开发中,Spring MVC 支持 Ant 风格路径的同时,还可以与路径变量、正则表达式等功能结合使用。
示例 1:路径变量 + Ant 风格
@RequestMapping("/user/{id}/**") // 匹配多层路径,id 为路径变量
public String handleUser(@PathVariable("id") String userId) {
    return "User ID: " + userId;
}
- 这个路径匹配
/user/123/abc/xyz,其中id会捕获为123。
示例 2:正则表达式 + Ant 风格
@RequestMapping("/product/{id:\\d+}/**") // 正则匹配数字 id
public String handleProduct(@PathVariable("id") String productId) {
    return "Product ID: " + productId;
}
- 这里的路径
/product/{id:\\d+}/**只会匹配数字形式的id,比如/product/123/abc/xyz。
4. 优先级和匹配规则
在使用 Ant 风格路径匹配时,路径匹配的优先级有一定的规则。具体来说,/** 会匹配任何路径,所以它的优先级通常较低,避免与其他精确匹配的路径冲突。
示例:优先级比较
@Controller
@RequestMapping("/foo")
public class FooController {

    @RequestMapping("/foo/{id}") // 精确匹配路径 /foo/{id}
    public String handleFoo(@PathVariable String id) {
        return "foo:" + id;
    }

    @RequestMapping("/foo/**") // 匹配所有以 /foo/ 开头的路径
    public String handleFooCatchAll() {
        return "catchAll";
    }
}
在这个例子中,如果访问 /foo/bar,它会首先匹配 /foo/{id},因为它更精确。
编写Spring应用
@SpringBootApplication 注解
@EnableAutoConfiguration:- 这个注解让 Spring Boot 根据项目中的依赖,自动配置 Spring 应用程序。Spring Boot 提供了大量的自动配置支持,帮助我们省去手动配置许多常见的功能。
- 例如,如果你的项目中加入了
spring-boot-starter-web依赖,Spring Boot 会自动配置一个嵌入式的 Tomcat 服务器和一些常见的 Web 功能。
@ComponentScan:- 这个注解启用 Spring 的组件扫描机制。它会扫描当前类所在的包及其子包,自动发现并注册
@Component、@Service、@Repository、@Controller等注解标注的类。 - 通过
@ComponentScan,你不需要手动指定要扫描的包,Spring Boot 会自动扫描当前包及其子包下的所有组件。
- 这个注解启用 Spring 的组件扫描机制。它会扫描当前类所在的包及其子包,自动发现并注册
@Configuration:- 这个注解表示该类是一个 Spring 配置类,类似于 XML 配置文件,用于定义 Spring 应用的 Bean 配置。
- 该类可以包含
@Bean注解的方法,返回要管理的 Bean。
@SpringBootTest 注解
@SpringBootTest 注解是用于测试 Spring Boot 应用的一个重要注解,它提供了一种方便的方式来启动 Spring Boot 应用上下文,并对整个 Spring Boot 应用进行集成测试。这个注解本身也包含了多个注解,它使得我们能够在测试类中创建一个完整的 Spring 容器来进行集成测试。
具体来说,@SpringBootTest 是一个组合注解,它整合了以下几个主要的注解:
@ContextConfiguration:@ContextConfiguration注解用于加载 Spring 配置文件或者配置类,在测试时会初始化 Spring 容器。@SpringBootTest默认会加载 Spring Boot 应用的主配置类(即包含@SpringBootApplication注解的类),作为 Spring 容器的上下文。- 它的作用是让测试类能够加载到 Spring 配置并创建一个完整的应用上下文。
@TestExecutionListeners:- 该注解指定了测试执行时的监听器。在 Spring 测试框架中,
@TestExecutionListeners会提供某些扩展功能,如事务管理、环境配置等,但它的实际作用在大多数测试中不太明显,通常由 Spring Boot 自动配置。
- 该注解指定了测试执行时的监听器。在 Spring 测试框架中,
@DirtiesContext:- 这个注解会告诉 Spring 在测试执行之后清除(或重置)应用上下文,通常用于测试中的应用上下文需要被清理或重置,以避免测试间的相互影响。
@SpringBootTest会根据需要处理上下文的清理工作。
- 这个注解会告诉 Spring 在测试执行之后清除(或重置)应用上下文,通常用于测试中的应用上下文需要被清理或重置,以避免测试间的相互影响。
@BootstrapWith:- 这个注解是用于引导测试的,它会指定
SpringBootTestContextBootstrapper来启动 Spring Boot 测试上下文。这是一个 Spring Boot 测试框架中的内部机制,用于初始化应用上下文并准备测试。
- 这个注解是用于引导测试的,它会指定
测试页面
编写控制界面,返回index.html
@RequestMapping
@Controller
public class HomeController {

    @Operation(summary = "主页内容")
    @GetMapping("index")
    public String index() {
        return "index";
    }
}
测试页面返回结果
@WebMvcTest(HomeController.class)
class HomeControllerTest {

    @Autowired
    private MockMvc mockMvc;

    @Test
    void index() throws Exception {
        mockMvc.perform(MockMvcRequestBuilders.get("/"))// 访问路径
                .andExpect(MockMvcResultMatchers.status().isOk())// 判断状态是否成功
                .andExpect(MockMvcResultMatchers.view().name("index"))// 判断视图名称是否是index
            	// 是否包含字段
                .andExpect(MockMvcResultMatchers.content().string(Matchers.containsString("欢迎。。。")));
    }
}
访问index的页面
<!DOCTYPE html>
<html lang="en">
    <head>
        <meta charset="UTF-8">
        <title>Index 测试页面</title>
    </head>
    <body>
        <h1>欢迎。。。</h1>
        <img alt="" th:src="@{/images/icon_3.png}">
        <img alt="通常MVC项目静态资源放在 static/images 下" src="images/index/diannao.png">
    </body>
</html>
静态资源问题,如果用户是访问静态资源,如果直接写在
template方式引入资源会找不到,因为默认资源都放在static目录下载的。
什么时候该用这种测试
1. 验证控制器的业务逻辑
@WebMvcTest本质上是用来验证 控制器层的行为,而不是渲染出来的页面。它帮助你测试控制器是否能正确处理 HTTP 请求、是否返回正确的视图名称或正确的响应状态码等。- 比如,你可以测试一个
GET /home请求是否返回了预期的视图名称"index",或者返回的状态码是否是200 OK,而这些正是你在控制器中希望验证的部分。这与页面渲染无关,所以它不会显示页面内容,也不会出现渲染时的误差。
2. 关注点分离
- 使用
@WebMvcTest进行单元测试能够将 Web 层 与 业务逻辑层(Service、Repository)进行解耦。通过这种方式,你可以专注于测试控制器层的 HTTP 请求和响应,而不需要担心 Service 层的逻辑是否正确,或者数据库的连接是否正常。 - 控制器层和页面渲染是两个不同的关注点。控制器层的目标是处理请求、确定视图名称、返回模型数据等,而页面渲染本身通常由前端技术或模板引擎处理,更多是浏览器中的前端渲染过程。
3. 通过 Mock 数据模拟请求和响应
- 在
@WebMvcTest中,MockMvc会模拟请求并验证响应,它不会执行实际的页面渲染或显示,只会检查你定义的 控制器输出 是否符合预期。因此,它能有效避免浏览器渲染过程中的误差。 - 比如,
MockMvc可以验证你的控制器是否正确返回了某个 HTML 页面的视图名称,而不用关注 HTML 的具体内容。如果你的目标是确保控制器的逻辑没有错误,这种方式是非常高效的。
4. 测试时更快速且更简洁
- 通过
@WebMvcTest测试时,你只加载 Web 层的相关组件,不需要启动整个应用的上下文,因此测试速度通常更快。 - 它让你能够快速定位问题。例如,如果测试失败,你可以很清楚地知道是控制器中的视图名称、请求参数的处理,还是其他的 HTTP 相关操作出了问题。反而如果进行实际的浏览器渲染测试,可能涉及到浏览器兼容性、前端细节等问题,会增加复杂度。
5. 避免不必要的页面渲染
- 事实上,控制器的核心功能并不依赖于页面渲染。控制器应该保证的是:
- 正确处理请求
- 返回适当的视图名称和模型数据
- 设置正确的响应状态码和其他 HTTP 相关的参数
- 页面渲染通常是通过模板引擎(如 Thymeleaf、JSP)完成的,而
@WebMvcTest仅仅验证的是 控制器的行为,例如它返回的是正确的视图名称(而不是真的生成 HTML 页面)。
6. 不同类型的测试互为补充
-
你可以把
@WebMvcTest和 端到端测试(如集成测试或 UI 测试)结合起来使用:
@WebMvcTest用于测试控制器的行为、请求路径、视图名称等。- 端到端测试 可以通过实际浏览器或工具(如 Selenium)来模拟用户操作,查看页面是否正确渲染,验证 HTML 是否按预期显示。
访问控制
请求地址时返回对应的网页文件
@RestController用于返回对象格式的内容,在后面会使用ModelAndView可以返回网页文件@Controller用于返回网页文件
环境要求
  <dependency>
        <groupId>org.springframework.boot</groupId>
        <artifactId>spring-boot-starter-web</artifactId>
    </dependency>
    <dependency>
        <groupId>org.springframework.boot</groupId>
        <artifactId>spring-boot-starter-test</artifactId>
        <scope>test</scope>
    </dependency>
    <!-- thymeleaf -->
    <dependency>
        <groupId>org.springframework.boot</groupId>
        <artifactId>spring-boot-starter-thymeleaf</artifactId>
    </dependency>
    <!-- devtools -->
    <dependency>
        <groupId>org.springframework.boot</groupId>
        <artifactId>spring-boot-devtools</artifactId>
        <scope>runtime</scope>
        <optional>true</optional>
    </dependency>
    <!-- lombok -->
    <dependency>
        <groupId>org.projectlombok</groupId>
        <artifactId>lombok</artifactId>
        <version>1.18.36</version>
    </dependency>
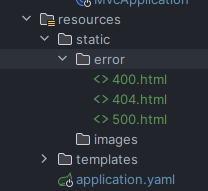
错误页面设置
在这个路径下可以配置错误码要访问的页面,也就是可以自定义页面内容
使用@Controller
返回需要访问的HTML内容页面,最后返回的字符串就是页面,这个页面位于templates目录下
@RequestMapping("/use")
@Controller
public class UseController {

    // 带参数访问
    @RequestMapping(value = "hello", method = RequestMethod.GET, params = {"name"})
    public String hello() {
        return "hello";
    }

    @GetMapping("jumpPage")
    public String jumpPage() {
        return "jumpPage";
    }

    @GetMapping("index")
    public String quick() {
        return "user";
    }

    // 跳转的页面
    @GetMapping("toJump")
    public String toJump() {
        return "redirect:jumpPage";
    }
}
如果在使用@Controller需要返回JSON内容,需要在控制器方法上加上@ResponseBody
@GetMapping("getJson")
@ResponseBody
public List<String> getJson() {
    ArrayList<String> list = new ArrayList<>();
    list.add("a");
    list.add("b");
    list.add("c");

    return list;
}
将视图和模型拆开
// 将视图和模型拆开
@GetMapping("page/test3")
public String test3(Model model) {
    model.addAttribute("test3", "测试3");
    return "page/test3";
}
使用@RestController
使用方式1
如果使用@RestController那么返回的就是JSON对象,但是这时候要想返回网页文件,需要使用ModelAndView
@RequestMapping("userRest")
@RestController
public class UseRestController {

    @GetMapping("page/test")
    public ModelAndView test() {
        ModelAndView modelAndView = new ModelAndView();
        modelAndView.setViewName("page/test");
        modelAndView.addObject("message", "这是消息内容");
        return modelAndView;
    }
}
我们引入了thymeleaf所以有以下内容<h4 th:text="'消息:'+ ${message}"></h4>
<!DOCTYPE html>
<html lang="en">
<head>
    <meta charset="UTF-8">
    <title>使用RestController返回页面信息</title>
</head>
<body>
<h3>使用RestController返回页面信息</h3>
<h4 th:text="'消息:'+ ${message}"></h4>
</body>
</html>
其中
modelAndView.addObject("message", "这是消息内容");是可选的
使用方式2
在控制器方法上使用ModelAndView
@GetMapping("page/test2")
public ModelAndView test2(ModelAndView modelAndView) {
    modelAndView.addObject("hello", "你好");
    modelAndView.setViewName("page/test2");
    return modelAndView;
}
向session共享数据
在 Spring MVC 中,Session 是用于存储用户会话期间的数据的一种机制。每个用户访问的应用程序都将拥有一个唯一的会话。通过 HttpSession,可以在用户的会话中存储一些数据,直到用户关闭浏览器或会话过期。
Spring MVC 提供了多种方式来与 HttpSession 进行交互,下面详细介绍如何通过 HttpSession 向 Session 共享数据。
1. 通过 HttpSession 操作 Session 数据
在 Spring MVC 控制器中,您可以通过 HttpSession 对象来存储和读取会话数据。
示例:将数据添加到 Session
@Controller
public class SessionController {

    @RequestMapping("/setSessionData")
    public String setSessionData(HttpSession session) {
        // 将数据存储到 Session 中
        session.setAttribute("username", "JohnDoe");
        session.setAttribute("age", 30);
        return "sessionSet";  // 返回视图名
    }

    @RequestMapping("/getSessionData")
    public String getSessionData(HttpSession session, Model model) {
        // 从 Session 中获取数据
        String username = (String) session.getAttribute("username");
        Integer age = (Integer) session.getAttribute("age");
        model.addAttribute("username", username);
        model.addAttribute("age", age);
        return "sessionData";  // 返回视图名
    }
}
URL 请求:
GET /setSessionData会将数据"username": "JohnDoe"和"age": 30存储到 Session 中。GET /getSessionData会从 Session 中获取并显示存储的值。
2. 使用 @SessionAttributes 注解
@SessionAttributes 注解用于将控制器中的某些模型属性放入 Session 中。这种方式比直接操作 HttpSession 更为方便和简洁,特别是当需要共享多个模型属性时。
示例:使用 @SessionAttributes
@Controller
@SessionAttributes("user")
public class UserController {

    // 在模型中添加用户对象
    @RequestMapping("/setUser")
    public String setUser(Model model) {
        User user = new User("John", 30);
        model.addAttribute("user", user);
        return "userSet";
    }

    // 从 Session 中获取用户对象
    @RequestMapping("/getUser")
    public String getUser(@ModelAttribute("user") User user, Model model) {
        model.addAttribute("user", user);
        return "userDetails";
    }
}
URL 请求:
GET /setUser会将user对象放入 Session 中。GET /getUser会从 Session 中获取user对象。
@SessionAttributes 注解不仅可以放入 Session 中,还可以与 @ModelAttribute 注解结合使用,确保模型数据保持在 Session 中。
3. 使用 @ModelAttribute 注解
@ModelAttribute 注解允许将数据放入模型中,并且在方法调用前通过 Model 传递给视图。如果和 @SessionAttributes 一起使用,它可以将属性直接添加到 HttpSession。
示例:使用 @ModelAttribute 和 @SessionAttributes
@Controller
@SessionAttributes("cart")
public class CartController {

    // 在模型中创建并存储购物车
    @ModelAttribute("cart")
    public Cart createCart() {
        return new Cart();  // 创建一个空的购物车对象
    }

    // 添加商品到购物车
    @RequestMapping("/addToCart")
    public String addToCart(@ModelAttribute("cart") Cart cart, @RequestParam("item") String item) {
        cart.addItem(item);  // 将商品添加到购物车
        return "cartUpdated";
    }

    // 显示购物车内容
    @RequestMapping("/viewCart")
    public String viewCart(@ModelAttribute("cart") Cart cart, Model model) {
        model.addAttribute("cart", cart);
        return "viewCart";
    }
}
URL 请求:
GET /addToCart?item=Apple会将Apple添加到cart中。GET /viewCart会显示购物车中的内容。
4. 通过 @RequestParam 或 @PathVariable 获取 Session 数据
如果在请求中需要通过路径变量或请求参数传递数据并存储到 Session 中,可以结合 @RequestParam 或 @PathVariable 来实现。
示例:使用 @RequestParam 存储 Session 数据
@Controller
public class SessionController {

    @RequestMapping("/setSession/{username}")
    public String setSessionData(@PathVariable("username") String username, HttpSession session) {
        session.setAttribute("username", username);
        return "sessionSet";
    }

    @RequestMapping("/getSession")
    public String getSessionData(HttpSession session, Model model) {
        String username = (String) session.getAttribute("username");
        model.addAttribute("username", username);
        return "sessionData";
    }
}
URL 请求:
GET /setSession/JohnDoe会将"username": "JohnDoe"存储到 Session 中。GET /getSession会从 Session 中获取并显示username。
5. 删除 Session 数据
如果希望在某个操作后清除 Session 中的某些数据,可以使用 HttpSession 提供的 removeAttribute 方法。
示例:删除 Session 数据
@Controller
public class SessionController {

    @RequestMapping("/removeSessionData")
    public String removeSessionData(HttpSession session) {
        session.removeAttribute("username");  // 删除指定的属性
        return "sessionRemoved";
    }
}
URL 请求:
GET /removeSessionData会从 Session 中删除"username"属性。
6. Session 过期与清理
默认情况下,Spring MVC 的 HttpSession 会话会在用户关闭浏览器后过期,或者会话超时(默认30分钟)。可以在 web.xml 或应用的配置类中设置会话超时:
示例:设置 Session 超时
<session-config>
    <session-timeout>30</session-timeout> <!-- 设置会话超时为30分钟 -->
</session-config>
7. 通过 Spring 配置 Session
通过 Spring 配置文件或 Java 配置类,还可以控制 Session 的相关行为(如会话过期时间、session 的持久化等)。
示例:Java 配置类
@Configuration
@EnableWebMvc
public class WebConfig implements WebMvcConfigurer {

    @Override
    public void addInterceptors(InterceptorRegistry registry) {
        registry.addInterceptor(new SessionInterceptor()).addPathPatterns("/**");
    }
}
SessionInterceptor 可以用于监控和管理 Session 数据。
在 Spring MVC 中,向 Session 共享数据主要有以下几种方式:
HttpSession:通过HttpSession对象存储和读取 Session 数据。@SessionAttributes:通过@SessionAttributes注解将模型属性添加到 Session 中。@ModelAttribute:结合@SessionAttributes使用,将模型数据持久化到 Session 中。@RequestParam和@PathVariable:将请求参数或路径变量存储到 Session 中。- Session 过期与清理:可以通过配置控制会话超时,或手动清除 Session 数据。
向application域共享数据
在 Spring MVC 中,Application 域(也称为 ServletContext)是一个全局范围,用于在整个应用程序中共享数据。不同于 Session 域和 Request 域,Application 域中的数据对整个 Web 应用的所有用户都是可见的,因此适合存储全局共享的配置信息、常量、初始化数据等。
在 Spring MVC 中,我们可以通过 ServletContext 来向 Application 域共享数据,通常使用 setAttribute 和 getAttribute 方法来进行操作。
1. 通过 ServletContext 共享数据
ServletContext 是与整个 Web 应用程序相关联的对象,它允许你在多个请求和多个会话之间共享数据。在 Spring MVC 中,可以通过以下两种方式来访问 ServletContext:
- 直接使用
HttpServletRequest.getSession().getServletContext()获取ServletContext。 - 使用
@Autowired注解注入ServletContext对象。
示例 1:通过 ServletContext 共享数据
1.1 通过 HttpServletRequest 获取 ServletContext
@Controller
public class ApplicationController {

    @RequestMapping("/setApplicationData")
    public String setApplicationData(HttpServletRequest request) {
        // 获取 ServletContext
        ServletContext servletContext = request.getServletContext();
        // 向 Application 域存储数据
        servletContext.setAttribute("appName", "SpringMVCApp");
        servletContext.setAttribute("version", "1.0.0");
        return "applicationDataSet";
    }

    @RequestMapping("/getApplicationData")
    public String getApplicationData(HttpServletRequest request, Model model) {
        // 获取 ServletContext
        ServletContext servletContext = request.getServletContext();
        // 从 Application 域获取数据
        String appName = (String) servletContext.getAttribute("appName");
        String version = (String) servletContext.getAttribute("version");

        model.addAttribute("appName", appName);
        model.addAttribute("version", version);
        return "applicationData";
    }
}
URL 请求:
GET /setApplicationData会向Application域中存储"appName": "SpringMVCApp"和"version": "1.0.0"。GET /getApplicationData会从Application域中读取数据,并返回给视图。
1.2 通过 @Autowired 注入 ServletContext
@Controller
public class ApplicationController {

    @Autowired
    private ServletContext servletContext;

    @RequestMapping("/setApplicationData")
    public String setApplicationData() {
        // 向 Application 域存储数据
        servletContext.setAttribute("appName", "SpringMVCApp");
        servletContext.setAttribute("version", "1.0.0");
        return "applicationDataSet";
    }

    @RequestMapping("/getApplicationData")
    public String getApplicationData(Model model) {
        // 从 Application 域获取数据
        String appName = (String) servletContext.getAttribute("appName");
        String version = (String) servletContext.getAttribute("version");

        model.addAttribute("appName", appName);
        model.addAttribute("version", version);
        return "applicationData";
    }
}
在这个例子中,@Autowired 注解会自动将 ServletContext 注入到控制器中。
2. 应用场景
将数据放到 Application 域中通常用于存储以下类型的数据:
- 应用级别的数据:例如应用名称、版本号、初始化配置等,这些数据是全局共享的。
- 常量和初始化信息:如果有一些需要在多个请求中共享的常量或初始化信息,可以将它们放到
Application域中。 - 数据库连接池或常用资源:对于一些全局共享的资源(如数据库连接池),可以在
Application域中进行配置并在不同的请求中共享。
3. 注意事项
- 全局共享:与
Session和Request域不同,Application域中的数据对所有用户和请求都可见。因此,要特别小心在Application域中存储敏感数据,避免泄漏用户个人信息等。 - 生命周期:
Application域中的数据在整个应用程序生命周期内有效,直到应用服务器重新启动。因此,放入Application域的数据一般是全局的、不会频繁变化的。 - 线程安全:
Application域的数据是共享的,因此在并发访问时要考虑线程安全问题。如果有多个线程访问同一数据,可能需要进行同步。
4. 清理 Application 域中的数据
如果不再需要某个共享数据,可以使用 removeAttribute 方法从 Application 域中移除该数据。
示例:删除 Application 域中的数据
@Controller
public class ApplicationController {

    @RequestMapping("/removeApplicationData")
    public String removeApplicationData(HttpServletRequest request) {
        // 获取 ServletContext
        ServletContext servletContext = request.getServletContext();
        // 从 Application 域移除数据
        servletContext.removeAttribute("appName");
        servletContext.removeAttribute("version");
        return "applicationDataRemoved";
    }
}
URL 请求:
GET /removeApplicationData会从Application域中移除appName和version属性。
5. 使用 @ApplicationScope(Spring 方式)
如果使用 Spring 框架进行开发,也可以使用 Spring 提供的 @ApplicationScope 注解来定义在整个应用范围内共享的 Bean。这种方法通常用于 Spring 组件,而不是直接操作 ServletContext。
示例:使用 @ApplicationScope
@Component
@Scope("application")
public class AppConfig {
    private String appName = "SpringMVCApp";

    public String getAppName() {
        return appName;
    }
}
在这种情况下,Spring 管理的 Bean 会在应用级别共享,类似于 ServletContext 中存储的数据。
Application域(即ServletContext)用于在整个应用程序范围内共享数据,适合存储全局共享的信息、配置和常量。- 通过
HttpServletRequest.getServletContext()或@Autowired注解可以访问ServletContext并向Application域中共享数据。- 数据存储在
Application域中可以在整个应用程序生命周期内有效,适用于共享全局性的、无需频繁更新的数据。- 应谨慎存储敏感数据,并注意线程安全和数据的生命周期。
重定向和转发使用
在 Spring MVC 中,**重定向(Redirect)和转发(Forward)**是两种常见的请求处理方式,它们分别用于不同的场景。Spring 提供了灵活的 API 来实现这两种请求方式。
1. 转发(Forward)
转发是指服务器将请求转发到另一个资源(如 JSP 页面或另一个控制器方法),并且请求和响应都不会发生改变。即,URL 不会发生变化,客户端仍然看到原始的 URL。
转发的实现
在 Spring MVC 中,可以通过以下两种方式实现转发:
- 使用
RequestDispatcher.forward()方法。 - 使用
ModelAndView中的"forward:"前缀来指定转发的路径。
示例 1:使用 RequestDispatcher 转发
@Controller
public class ForwardController {

    @RequestMapping("/forwardExample")
    public void forward(HttpServletRequest request, HttpServletResponse response) throws ServletException, IOException {
        // 使用 Servlet 的 RequestDispatcher 进行转发
        request.getRequestDispatcher("/forwardedPage").forward(request, response);
    }

    @RequestMapping("/forwardedPage")
    public String forwardedPage() {
        return "forwardedPage";  // 返回视图
    }
}
示例 2:使用 ModelAndView 转发
@Controller
public class ForwardController {

    @RequestMapping("/forwardExample")
    public ModelAndView forwardExample() {
        // 使用 ModelAndView 进行转发
        return new ModelAndView("forward:/forwardedPage");
    }

    @RequestMapping("/forwardedPage")
    public String forwardedPage() {
        return "forwardedPage";  // 返回视图
    }
}
解释:
forward:/forwardedPage表示将请求转发到/forwardedPage,且客户端的 URL 不会发生变化。- 在转发的过程中,控制器方法返回的视图会直接被渲染。
转发的特点
- URL 不改变:用户的浏览器地址栏不会发生变化,仍然显示原始的请求路径。
- 共享同一个请求:请求数据(如请求参数)会被转发到目标资源,可以通过
request对象共享。 - 适用于内部请求:转发是服务端内部的操作,适用于控制器之间的跳转或者从控制器到视图的跳转。
2. 重定向(Redirect)
重定向是指服务器告诉客户端(浏览器)重新发起一个新的请求。重定向会导致浏览器地址栏的 URL 更新为新的地址,因此会导致一次新的 HTTP 请求。
重定向的实现
在 Spring MVC 中,重定向可以通过以下几种方式实现:
- 使用
redirect:前缀返回视图。 - 使用
HttpServletResponse.sendRedirect()方法。
示例 1:使用 redirect: 前缀
@Controller
public class RedirectController {

    @RequestMapping("/redirectExample")
    public String redirectExample() {
        // 使用 redirect: 前缀进行重定向
        return "redirect:/redirectedPage";
    }

    @RequestMapping("/redirectedPage")
    public String redirectedPage() {
        return "redirectedPage";  // 返回视图
    }
}
示例 2:使用 HttpServletResponse.sendRedirect()
@Controller
public class RedirectController {

    @RequestMapping("/redirectExample")
    public void redirectExample(HttpServletResponse response) throws IOException {
        // 使用 HttpServletResponse.sendRedirect() 进行重定向
        response.sendRedirect("/redirectedPage");
    }

    @RequestMapping("/redirectedPage")
    public String redirectedPage() {
        return "redirectedPage";  // 返回视图
    }
}
解释:
redirect:/redirectedPage会发出一个 HTTP 302 重定向响应,浏览器会发起一次新的请求到/redirectedPage,并更新地址栏的 URL。- 使用
HttpServletResponse.sendRedirect()方法也会发送重定向响应,同样会导致浏览器重新发起新的请求。
重定向的特点
- URL 改变:浏览器的地址栏会更新为重定向的目标 URL。
- 不同的请求:重定向会产生一次新的 HTTP 请求,原请求的参数不会自动携带到新请求中,除非在重定向 URL 中显式传递。
- 适用于跨请求跳转:重定向适合用于不同请求之间的跳转,特别是当需要在多个请求中传递数据时。
3. 重定向与转发的区别
| 特性 | 重定向(Redirect) | 转发(Forward) |
|---|---|---|
| URL 变化 | 浏览器地址栏会更新为新的 URL | 浏览器地址栏不会改变,仍然是原始请求 URL |
| 请求次数 | 会产生两次请求:第一次请求重定向,第二次是新的目标请求 | 只会产生一次请求(内部请求) |
| 数据传递 | 重定向后,数据不能自动传递到新请求中,除非通过 URL 参数传递 | 可以直接传递请求数据,如请求参数和请求属性 |
| 适用场景 | 当需要跨请求或跨控制器传递数据时,或者需要跳转到外部 URL | 当请求处理完成后,内部跳转到另一个视图或资源时 |
| 性能 | 因为需要进行两次请求,所以相比转发略有性能开销 | 因为只需要一次请求,性能开销较小 |
4. 常见使用场景
(1) 重定向的使用场景
-
表单提交后的重定向:表单数据提交后,为了防止表单重复提交(用户刷新页面时),常常会使用重定向到另一个页面,这种方法叫做 Post/Redirect/Get (PRG) 模式。
例如,用户提交了一个订单数据后,页面显示 "订单已提交",并重定向到订单查看页面。
@RequestMapping("/submitOrder") public String submitOrder(Order order) { orderService.save(order); // 提交订单后重定向到订单详情页 return "redirect:/orderDetails?orderId=" + order.getId(); } -
外部 URL 重定向:在用户登录后重定向到外部系统或第三方网站。
@RequestMapping("/redirectToExternalSite")
public String redirectToExternal() {
    // 重定向到外部 URL
    return "redirect:http://www.example.com";
}
(2) 转发的使用场景
-
内部资源的转发:当需要在同一应用程序内部跳转时(如从控制器到视图),或者从一个控制器跳转到另一个控制器时,可以使用转发。
例如,在处理用户请求后,将其转发到 JSP 页面进行显示:
@RequestMapping("/showUser") public String showUserDetails(Model model) { User user = userService.getUser(); model.addAttribute("user", user); return "forward:/userDetails.jsp"; // 内部转发到 userDetails.jsp 页面 } -
从一个控制器跳转到另一个控制器:在处理完业务逻辑后,可能需要跳转到另一个控制器来处理某些逻辑。
@RequestMapping("/processOrder") public String processOrder(Order order) { orderService.process(order); return "forward:/orderConfirmation"; // 内部跳转到订单确认页面 } -
重定向(Redirect):客户端浏览器会发起一次新的请求,地址栏 URL 会发生变化,适用于需要跨请求跳转或外部跳转的场景。
-
转发(Forward):请求在服务器内部被转发,地址栏 URL 不变,适用于同一请求的内部跳转。
Spring 表单验证
在 Spring MVC 中,表单验证是通过一系列的注解来完成的。
@NotNull
-
作用:确保字段值不为空。
-
用法:用于字段、方法参数或返回值上,表示该字段不能为空。如果字段为空,将验证失败并返回相应的错误信息。
-
示例
@NotNull(message = "用户名不能为空")
private String username;
@NotEmpty
-
作用:确保字段不为空,并且不为一个空字符串。
-
用法:用于字符串、集合等类型,验证字段不仅不能为空,而且不能为空字符串。
-
示例
@NotEmpty(message = "密码不能为空")
private String password;
@NotBlank
-
作用:确保字段不为空,并且不为一个空白字符串(即非空白字符)。
-
用法:类似于
@NotEmpty,但除了不为空,还要求去除空白字符后不能为零长度。 -
示例
@NotBlank(message = "电子邮件不能为空")
private String email;
@Size(min, max)
-
作用:验证字段的大小,适用于字符串、集合、数组等类型。
-
用法:可以设置最小值和最大值来限制字段的长度或集合的大小。
-
示例
@Size(min = 6, max = 20, message = "密码长度必须在6到20之间")
private String password;
@Email
-
作用:验证字段是否符合有效的电子邮件格式。
-
用法:用于验证字符串字段是否为有效的电子邮件地址格式。
-
示例
@Email(message = "请输入有效的电子邮件地址")
private String email;
@Pattern(regexp)
-
作用:根据正则表达式验证字段值。
-
用法:可以根据自定义的正则表达式来验证字段的内容。
-
示例
@Pattern(regexp = "^\\d{10}$", message = "请输入有效的手机号码")
private String phoneNumber;
@Min(value) 和 @Max(value)
-
作用:确保数字类型字段的值在指定范围内。
-
用法:
@Min用于验证值是否大于等于指定的最小值,@Max用于验证值是否小于等于指定的最大值。 -
示例
@Min(value = 18, message = "年龄不能小于18岁")
@Max(value = 100, message = "年龄不能大于100岁")
private int age;
@DecimalMin(value) 和 @DecimalMax(value)
-
作用:用于验证浮动值是否在指定范围内,类似于
@Min和@Max,但适用于BigDecimal或Double类型的数值。 -
用法:
@DecimalMin验证值是否大于等于指定的最小值,@DecimalMax验证值是否小于等于指定的最大值。 -
示例
@DecimalMin(value = "0.0", inclusive = true, message = "价格不能小于0")
private BigDecimal price;
@Future
-
作用:验证日期字段的值是否为将来日期。
-
用法:用于
java.util.Date、java.time.LocalDate或java.time.LocalDateTime等日期类型的字段。 -
示例
@Future(message = "日期必须是未来的时间")
private LocalDate eventDate;
@Past
-
作用:验证日期字段的值是否为过去的日期。
-
用法:类似于
@Future,但是验证日期必须是过去的时间。 -
示例
@Past(message = "出生日期必须是过去的时间")
private LocalDate birthDate;
@AssertTrue
-
作用:验证字段值是否为
true。 -
用法:适用于布尔类型字段,如果值不是
true,则验证失败。 -
示例
@AssertTrue(message = "必须接受条款和条件")
private boolean acceptedTerms;
@AssertFalse
-
作用:验证字段值是否为
false。 -
用法:适用于布尔类型字段,如果值不是
false,则验证失败。 -
示例
@AssertFalse(message = "不能接受条款")
private boolean declinedTerms;
@Valid 和 @Validated
-
作用:触发嵌套对象的验证。
-
用法:当你有嵌套对象(如表单中的对象属性是另一个对象),使用
@Valid或@Validated注解来递归验证该对象。 -
示例
@Valid
private Address address;
@Digits(integer, fraction)
-
作用:验证数字字段的有效性,确保字段值是一个有效的数字,并且整数部分和小数部分的位数符合指定要求。
-
用法:
integer参数用于指定数字的整数部分的最大位数,fraction参数用于指定小数部分的最大位数。 -
示例
@Digits(integer = 5, fraction = 2, message = "金额应为最大5位整数和2位小数") private BigDecimal amount;- 这个例子验证金额字段的最大值为
99999.99(即最多5位整数和2位小数)。
- 这个例子验证金额字段的最大值为
@CreditCardNumber
-
作用:验证信用卡号的有效性,确保其符合信用卡的常见格式,通常包括 Luhn 算法的验证。
-
用法:该注解用于验证信用卡号的格式是否有效。
-
示例
@CreditCardNumber(message = "请输入有效的信用卡号") private String creditCardNumber;- 该注解会根据常见的信用卡规则(如 VISA、MasterCard 等)验证输入的信用卡号是否合法。
@Range(min, max)(不是 Spring 内置的,但通常来自 Hibernate Validator)
-
作用:验证字段值是否在指定的范围内。常用于
Integer、Long、Double等数值类型的字段。 -
用法:指定字段的有效范围,当值不在范围内时会验证失败。
-
示例
@Range(min = 1, max = 100, message = "数字必须在1到100之间") private int quantity;- 该注解会验证
quantity字段的值是否在1到100之间。
- 该注解会验证
@URL
-
作用:验证字段是否为有效的 URL 格式。
-
用法:用于字符串类型的字段,验证其是否符合有效的 URL 格式。
-
示例
@URL(message = "请输入有效的网址")
private String website;
@Valid 与 @Validated
-
作用:用于嵌套对象的验证,确保嵌套对象的字段也进行验证。
-
用法:这两个注解会触发嵌套对象的验证,通常用于嵌套的复杂表单数据结构。
-
示例
@Valid private Address address;- 如果
Address类中有字段使用了验证注解,@Valid会递归地验证Address对象的所有字段。
- 如果
@FutureOrPresent
-
作用:验证日期或时间字段的值是否是当前日期(包括今天)或未来的日期。
-
用法:该注解用于日期和时间字段,确保其为今天或将来的日期。
-
示例
:
@FutureOrPresent(message = "事件日期必须是今天或将来")
private LocalDate eventDate;
@PastOrPresent
-
作用:验证日期或时间字段的值是否是当前日期(包括今天)或过去的日期。
-
用法:与
@FutureOrPresent相反,确保字段是过去或今天的日期。 -
示
@PastOrPresent(message = "出生日期必须是过去的时间或今天")
private LocalDate birthDate;
@Null
-
作用:验证字段是否为
null。如果字段不为空,则验证失败。 -
用法:该注解可以用于字段或方法参数上,确保字段值必须为
null。 -
示例
@Null(message = "该字段必须为null")
private String nickname;
@ScriptAssert(lang, script)
-
作用:通过自定义脚本验证字段值。
-
用法:允许使用自定义脚本(如 JavaScript)来执行复杂的验证逻辑。需要指定脚本语言和脚本内容。
-
示例
@ScriptAssert(lang = "javascript", script = "_this.password == _this.confirmPassword", message = "密码和确认密码必须一致") private String password; private String confirmPassword;- 这个注解可以用于检查两个字段值是否一致。
@UniqueElements(Hibernate Validator 扩展)
-
作用:确保集合中的元素是唯一的,常用于 List 或 Set 类型字段。
-
用法:适用于集合类型字段,确保集合中的元素不重复。
-
示例
@UniqueElements(message = "列表中的元素必须唯一")
private List<String> tags;
Thymeleaf快速入门
Thymeleaf 是一种现代化的 Java 模板引擎,广泛用于生成 HTML、XML、JavaScript 等内容。它有许多内置的指令和功能,用于渲染动态内容、条件渲染、循环、处理表达式等。以下是 Thymeleaf 中常见的指令和属性的详细介绍:
1. th:text
用于替换元素的文本内容。
<span th:text="${message}"></span>
${message}的值会替换span元素的文本。
如果需要格式化日期,需要注意,使用
temporals进行操作<td class="text-success" th:text="${#temporals.format(bill.transactionDate,'yyyy-MM-dd HH:mm:ss')}"></td>
2. th:utext
用于替换元素的文本内容,并允许处理 HTML 标签(不会转义 HTML)。
<span th:utext="${htmlContent}"></span>
${htmlContent}的内容直接插入,并解析其中的 HTML。
3. th:value
设置表单元素的 value 属性,通常用于输入框或选择框。
<input type="text" th:value="${user.name}" />
- 将
${user.name}的值赋给该输入框的value属性。
4. th:each
用于循环遍历集合或数组。
<ul>
    <li th:each="person : ${people}">
        <span th:text="${person.name}"></span>
    </li>
</ul>
- 遍历
people集合,输出每个person.name。
5. th:if
用于条件渲染,只有满足条件时才渲染元素。
<div th:if="${user.isAdmin}">
    <p>Welcome, admin!</p>
</div>
- 如果
user.isAdmin为true,渲染该div。
6. th:unless
与 th:if 相反,只有条件为 false 时才渲染元素。
<div th:unless="${user.isAdmin}">
    <p>You are not an admin!</p>
</div>
- 如果
user.isAdmin为false,渲染该div。
7. th:attr
用于设置元素的多个属性。
<img th:attr="src=${imageUrl}" th:attr="alt=${imageDescription}" />
- 设置
img元素的src和alt属性。
8. th:src / th:href
用于动态设置 src 或 href 属性。
<img th:src="@{${imageUrl}}" alt="Image">
<a th:href="@{${linkUrl}}">Click Here</a>
th:src用于设置图片的src属性,th:href用于设置链接的href属性。
9. th:class
动态设置 class 属性,支持条件表达式。
<div th:class="${isActive} ? 'active' : 'inactive'">...</div>
- 如果
isActive为true,设置class="active",否则为inactive。
10. th:classappend / th:classprepend
分别在现有的 class 属性上追加或前置新类。
<div th:classappend="'newClass'">...</div>
<div th:classprepend="'prefixClass'">...</div>
th:classappend会将新的类追加到现有类的后面。th:classprepend会将新的类添加到现有类的前面。
11. th:id
设置元素的 id 属性。
<input type="text" th:id="${elementId}" />
- 设置
input元素的id为${elementId}的值。
12. th:action
设置表单的 action 属性。
<form th:action="@{/submitForm}" method="post">
    <!-- form fields -->
</form>
- 设置表单的
action为/submitForm。
13. th:style
设置元素的 style 属性。
<div th:style="'color: ' + ${color}"></div>
- 动态设置
style属性,${color}的值会成为color样式的值。
14. th:fragment
定义一个可重用的片段,通常在模板中调用。
<div th:fragment="userFragment">
    <p>Welcome, <span th:text="${user.name}"></span></p>
</div>
- 定义一个
userFragment片段,可以在其他模板中引用。
15. th:replace
替换当前元素,并将一个片段或其他模板插入其中。
<div th:replace="~{userFragment}"></div>
th:replace会将userFragment片段的内容插入到当前div中。
16. th:include
将另一个模板的内容插入当前模板中,但不会替换当前元素。
<div th:include="~{userFragment}"></div>
- 插入
userFragment的内容,但保留当前div元素。
17. th:with
局部变量声明,用于在模板中定义临时变量。
<div th:with="total=${cart.totalPrice}">
    <p th:text="'Total price: ' + ${total}"></p>
</div>
th:with用于在当前元素的上下文中定义变量,类似于局部变量。
18. th:block
在模板中定义一个不会渲染任何 HTML 标签的块元素。用于组合多个元素。
<th:block th:each="person : ${people}">
    <p th:text="${person.name}"></p>
</th:block>
th:block不会渲染任何标签,但可以用来包装多个元素进行条件判断或循环。
19. th:switch / th:case
类似于 Java 中的 switch 语句,用于条件选择。
<div th:switch="${status}">
    <span th:case="'active'">Active</span>
    <span th:case="'inactive'">Inactive</span>
    <span th:case="*">Unknown</span>
</div>
- 根据
${status}的值,渲染对应的span元素。
20. th:object
用来为表单元素绑定一个对象。
<form th:action="@{/submit}" th:object="${user}">
    <input type="text" th:field="*{name}" />
    <input type="text" th:field="*{email}" />
    <button type="submit">Submit</button>
</form>
th:object绑定整个表单到user对象。th:field用于绑定每个表单字段到对象的属性。
21. th:href / th:src
用于动态设置 URL 值。
<a th:href="@{/users/{id}(id=${user.id})}">Profile</a>
<img th:src="@{/images/{imageName}(imageName=${image.name})}" />
- 动态生成 URL,支持路径变量的替换。
22. th:placeholder
设置表单输入框的 placeholder 属性。
<input type="text" th:placeholder="${placeholderText}" />
- 设置
input的placeholder为${placeholderText}的值。
23. th:errors
显示与 username 属性相关的错误信息。如果 username 为空或者不符合验证规则,这里就会显示出相应的错误消息。
<div th:errors="*{email}"></div> <!-- 错误信息展示 -->
你还可以通过 th:errors 对错误消息进行自定义格式化。例如,使用 *{field} 可以获取字段的错误信息。
<div th:errors="*{username}">Error</div>
如果验证失败,错误消息将显示在 <div> 中。如果没有错误,它会显示默认的 "Error" 文本。
SpringSecurity
密码转换器(Password Encoder)
Spring Security 提供了多种密码转换器(Password Encoder),这些转换器用于对用户密码进行加密和验证。常见的密码转换器包括:
-
BCryptPasswordEncoder:
-
使用 BCrypt 算法对密码进行加密。
-
是最常用的密码加密方案,具有强大的加密性,并且支持自动加盐(salt),防止暴力破解攻击。
-
示例:
@Bean
public PasswordEncoder passwordEncoder() {
    return new BCryptPasswordEncoder();
}
-
-
NoOpPasswordEncoder:
-
不对密码进行加密,直接返回明文密码。
-
主要用于开发和测试环境,不推荐在生产环境中使用。
-
示例:
@Bean
public PasswordEncoder passwordEncoder() {
    return NoOpPasswordEncoder.getInstance();
}
-
-
Pbkdf2PasswordEncoder:
-
使用 PBKDF2 算法进行密码加密。
-
提供较强的安全性,并且支持对密码进行哈希。
-
示例:
@Bean
public PasswordEncoder passwordEncoder() {
    return new Pbkdf2PasswordEncoder();
}
-
-
Argon2PasswordEncoder:
-
使用 Argon2 算法对密码进行加密。
-
Argon2 是目前被认为最强的密码哈希算法,支持内存密集型计算,从而防止硬件加速破解。
-
示例:
@Bean
public PasswordEncoder passwordEncoder() {
    return new Argon2PasswordEncoder();
}
-
-
SCryptPasswordEncoder:
-
使用 SCrypt 算法进行密码加密。
-
SCrypt 是另一种内存密集型的密码加密算法,与 Argon2 类似,旨在防止硬件加速破解。
-
示例:
@Bean
public PasswordEncoder passwordEncoder() {
    return new SCryptPasswordEncoder();
}
-
-
MessageDigestPasswordEncoder (已废弃):
- 基于 MessageDigest 算法进行加密(如 SHA-1、SHA-256 等)。
- 由于缺乏盐和密钥加密机制,已被其他更强的加密方式所替代。
选择密码转换器的建议:
- 在现代应用中,推荐使用 BCryptPasswordEncoder 或 Argon2PasswordEncoder,这两种算法提供了强大的加密性。
- Pbkdf2PasswordEncoder 和 SCryptPasswordEncoder 也可以作为备选方案,尤其是当你希望加密算法能够承受更多资源密集型攻击时。
- NoOpPasswordEncoder 仅限于开发和测试环境。
访问主页
需要使用http://localhost:8080/index来访问主页,可以在配置中配置,访问根路径直接跳转
@RequestMapping
@Controller
public class HomeController {

    @Operation(summary = "主页内容")
    @GetMapping("index")
    public String index() {
        return "index";
    }

    @Operation(summary = "订单内容")
    @GetMapping("order")
    public String order() {
        return "order";
    }

    @Operation(summary = "login")
    @GetMapping("login")
    public String login() {
        return "login";
    }
}
在配置中
import org.springframework.context.annotation.Configuration;
import org.springframework.web.servlet.config.annotation.ViewControllerRegistry;
import org.springframework.web.servlet.config.annotation.WebMvcConfigurer;

@Configuration
public class WebConfiguration implements WebMvcConfigurer {

    @Override
    public void addViewControllers(ViewControllerRegistry registry) {
        registry.addViewController("/")
                // .setViewName("forward:/index")  //两种方式写法
                .setViewName("index");
        registry.addViewController("/login");
    }
}
自定义登录
package cn.bunny.springdemo.configuration;

import cn.bunny.springdemo.dao.entity.AdminUser;
import org.springframework.context.annotation.Bean;
import org.springframework.context.annotation.Configuration;
import org.springframework.security.config.annotation.web.builders.HttpSecurity;
import org.springframework.security.core.userdetails.UserDetails;
import org.springframework.security.core.userdetails.UserDetailsService;
import org.springframework.security.crypto.password.PasswordEncoder;
import org.springframework.security.crypto.scrypt.SCryptPasswordEncoder;
import org.springframework.security.provisioning.InMemoryUserDetailsManager;
import org.springframework.security.web.SecurityFilterChain;

import java.util.ArrayList;

@Configuration
public class SecurityConfiguration {

    @Bean
    public PasswordEncoder passwordEncoder() {
        return new SCryptPasswordEncoder(4, 8, 1, 8, 32);
    }

    /**
     * 使用内存方式
     *
     * @param encoder 密码加密器
     * @return 基于内存的用户
     */
    @Bean
    public UserDetailsService userDetailsService(PasswordEncoder encoder) {
        ArrayList<UserDetails> userDetails = new ArrayList<>();
        userDetails.add(new AdminUser("admin", encoder.encode("admin"), true));
        userDetails.add(new AdminUser("bunny", encoder.encode("password"), true));

        return new InMemoryUserDetailsManager(userDetails);
    }

    // /**
    //  * 使用数据库方式
    //  *
    //  * @param userService 获取用户数据(如数据库)
    //  * @return 基于数据库的用户
    //  */
    // @Bean
    // public UserDetailsService userDetailsService(UserService userService) {
    //     return username -> {
    //         AdminUser adminUser = userService.getOne(Wrappers.<AdminUser>lambdaQuery().eq(AdminUser::getUsername, userService));
    //         if (adminUser != null) {
    //             return adminUser;
    //         }
    //         throw new UsernameNotFoundException("未找到 AdminUser");
    //     };
    // }

    @Bean
    public SecurityFilterChain filterChain(HttpSecurity security) throws Exception {
        return security
                .authorizeHttpRequests(authorizationManagerRequestMatcherRegistry ->
                        authorizationManagerRequestMatcherRegistry
                                .requestMatchers("/order").hasRole("USER")// 请求需要含有USER角色
                                .requestMatchers("/", "/index", "/login", "/images/**").permitAll()
                )
                /* 自定义登录页面 */
                // .formLogin(AbstractAuthenticationFilterConfigurer::permitAll)// 默认的登录页会自动启用,无需额外配置
                .formLogin(formLoginConfigurer -> formLoginConfigurer
                                .loginPage("/login")
                                // .loginProcessingUrl("/authenticate")
                                .usernameParameter("username")// 自定义用户名名称
                                .usernameParameter("password")// 自定义密码名称
                                .defaultSuccessUrl("/index")// 登录成功后默认跳转页面
                        // .defaultSuccessUrl("/index", true)// 登录成功后默认跳转页面,如果用户之前访问页面也需要强制跳转到 /index 可以传递第二个参数
                )
                .build();
    }
}
CSRF 伪造
通常在自定义登录页面中加入
<label>
    <input name="_csrf" placeholder="_csrf" th:value="${_csrf.token}" type="hidden"/>
</label>
如果需要禁用
.csrf(AbstractHttpConfigurer::disable)// 前后端分离可以禁用
开发授权服务器
<!--资源服务器-->
<dependency>
    <groupId>org.springframework.boot</groupId>
    <artifactId>spring-boot-starter-oauth2-resource server</artifactId>
</dependency>
<!-- 客户应用 -->
<dependency>
    <groupId>org.springframework.boot</groupId>
    <artifactId>spring-boot-starter-oauth2-client</artifactId>
</dependency>
<!-- 授权服务器 -->
<dependency>
    <groupId>org.springframework.boot</groupId>
    <artifactId>spring-boot-starter-oauth2-authorization-server</artifactId>
</dependency>